Friday, 6 January 2012

Fetta Pie with Short Crust Pastry

I have had a few people ask me about pastry making and how to get good results. I really think that a good pastry flour makes a real difference and the butter also ... I always use Paris Creek BD butter... more expensive than others but the difference in the finished product is worth it. Also the health benefits of eating organic butter are so worth it!

Eggs....I have a ragga muffin bunch of chooks... each with thier own personality... Love my chooks! They free range around the orchard and produce the most lovely eggs... Rosie's eggs, you can get them at the Adelaide Showgrounds Farmers Market are really good and I use her's if I need more than my girls are laying...


Short Crust Pastry
For my short crust pastry recipe you will need...
2 cups plain flour
100g butter ~ softened
1 egg
water ~ about 100 ml


To make you place 2 cups of flour in a bowl, chop your softened butter and add...


Then using the tips of your fingers rub the butter into the flour until it is looking like this...


Lots of recipe books use the term fine breadcrumbs...I never work my pastry dough that much... Next make a well in the centre of flour butter mix and crack in your egg. This photo has two eggs as I was making a double batch...


using a knife gently start to mix through the egg...


and it will look like this....


I then tip out my almost pastry onto a floured surface and make a well...


pour in about 50 ml of water and gently combine...
add more water until it starts to pull together
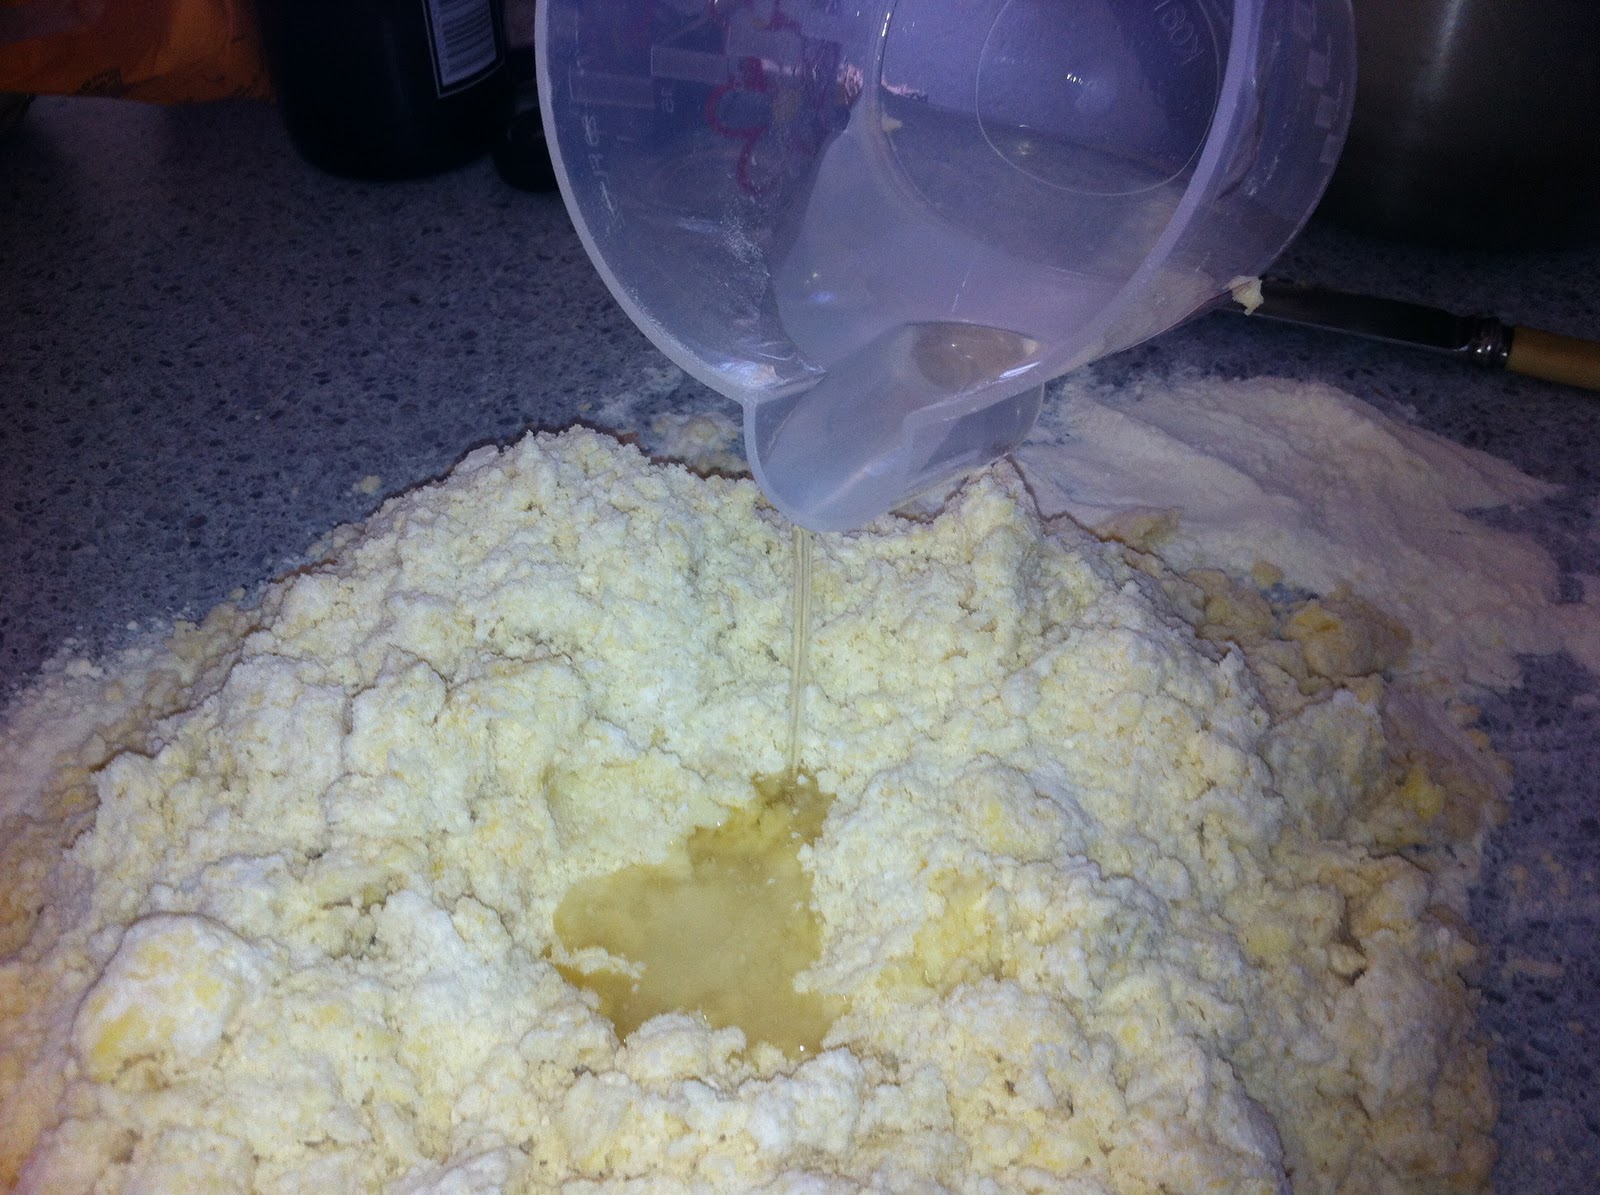

your pastry will start to come together and will....


look like this!


place onto grease proof paper... and flaten out to about 2cm thick, wrap in grease proof and place in the freezer!!.. this helps the pastry chill fast and make rolling out WAY easier... and the less you hanle your pastry the better it will be!!


get your oven on to 200c


I usually get my filling ready while my pastry is chillin! But before we get to that  ~ a word on blind baking...

BLIND BAKING...

This just refers to the placing of something heavy like rice or beans into the pastry shell when you start to cook...this stops the pastry bubbling up and keeps it nice and flat...I have of late been using a single layer of almonds without baking paper in with loads of success... then having yummy roasted almonds after as well! I made this pie on the last day of our hoilday and had to improvise with what was in the kitchen so I did this...oh and remember to prick the base of the pastry... it lets the steam out!


Roll out you pastry dough after its had a good chillax in the fridge/ freezer...It needs to feel firm to touch before you roll it out... roll out to 3 -4 ml thick and place in a pie dish about 20 - 30 cms.


Then blind Bake...

After about 10 minutes pull out the blind filling and bake for another 5 mintues...


Then pour in your filling and finish....
The Filling...

This is the pie/ tart/ quiche filling I always use...
Its dead easy...

250ml cream
250ml milk
6 eggs
salt & pepper
= mix all together...

Now to this you can add just about anything... experiment and try!

For today's recipe I also used

1/2  bunch of spring onions
125g bacon
1 clove of garlic
a small hanful of thyme
200g fetta
ripe tomatoes ~ I used black russians


Chop finely your spring onions, garlic, bacon and thyme and fry them off on fairly high heat to get some caramelising going on...after about 5 minutes turn off and place into the pastry case...


Then crumble over the fetta and pour in the egg, cream milk mix...


and bake for 20 minutes @ 200c until starts to set and brown...


Then palce on your slices tomatoes and bake for a futher 20 minutes...until its set firm and is golden brown... yum!!!!

Its really important to let any pie this style rest and firm up... serve with salad ...


My tips for fabulous pasty every time are these..
1. good quality ingredients
2. cool hands - warm hands release the glutens in the flour and make the pastry tough
3. don't over work your pastry
4.chill baby chill ~ both you and the pastry!


Enjoy

Yours,

Honey Lady


Wednesday, 4 January 2012

Chicken Provencale with Nokedli

One of my favorite foodie words is fusion... It gives me permission to pretty much experiment away with flavors all under the guise of fusion... I embrace this word! This dish is a classic fusion success story... French, Italian and Hungarian...


My parents are both Hugarian and so much of my early food experiences were Hungarian... I was also blessed with Italian aunts and uncles... Food growing, cooking and sharing was a constant through out my childhood and has greatly influenced the way I do family and food now...


My uncle Frank made the best dried olives with garlic and rosemary... And his wine... A little spritzy... But after a glass you really didn't care! Ahhh the memories!


So this dish draws on all these memories as well as bits and pieces I have picked up along the way...


I'm also really keen on food that I can throw together in a few minutes and leave to cook itself while I get on with other things... I'm also a big fan of minimal dishes... this dish ticks both these boxes! We are still on hoildays and this is what we had last night for dinner...

Chicken Provencale with Nokedli

 So lets get cooking...

You will need...


For the chicken Provencale


6-8 chicken thighs
1 bunch of basil
one brown and one red onion
3 cloves of garlic
680g pasatta
olive oil
salt
pepper


For the Nokedli


4 cups of plain flour
6 eggs
1/2 - 1 cup of water...
salt


To make the Provencale


Oven on 220c


This dish is a one pot wonder... Take a heavy casserole style dish and place a good glug of olive oil in the base... About 1cm deep. Peasant chop your onions... I like to use a mix of brown and Spanish onions... It's a better flavor than just brown in my opinion... Plus I like the colours! Put half of your onions on the bottom of the dish in the oil. Tear half of your basil and place in dish.


Take your garlic and using the blade of a wide knife crush the cloves...peel off the skin and take off the ends... Now a bit more peasant chopping of your garlic...And would you believe that is all your work done... 


All you have to do now is assemble and place in the oven... so next you throw in the garlic and place the chicken thighs on top... like so


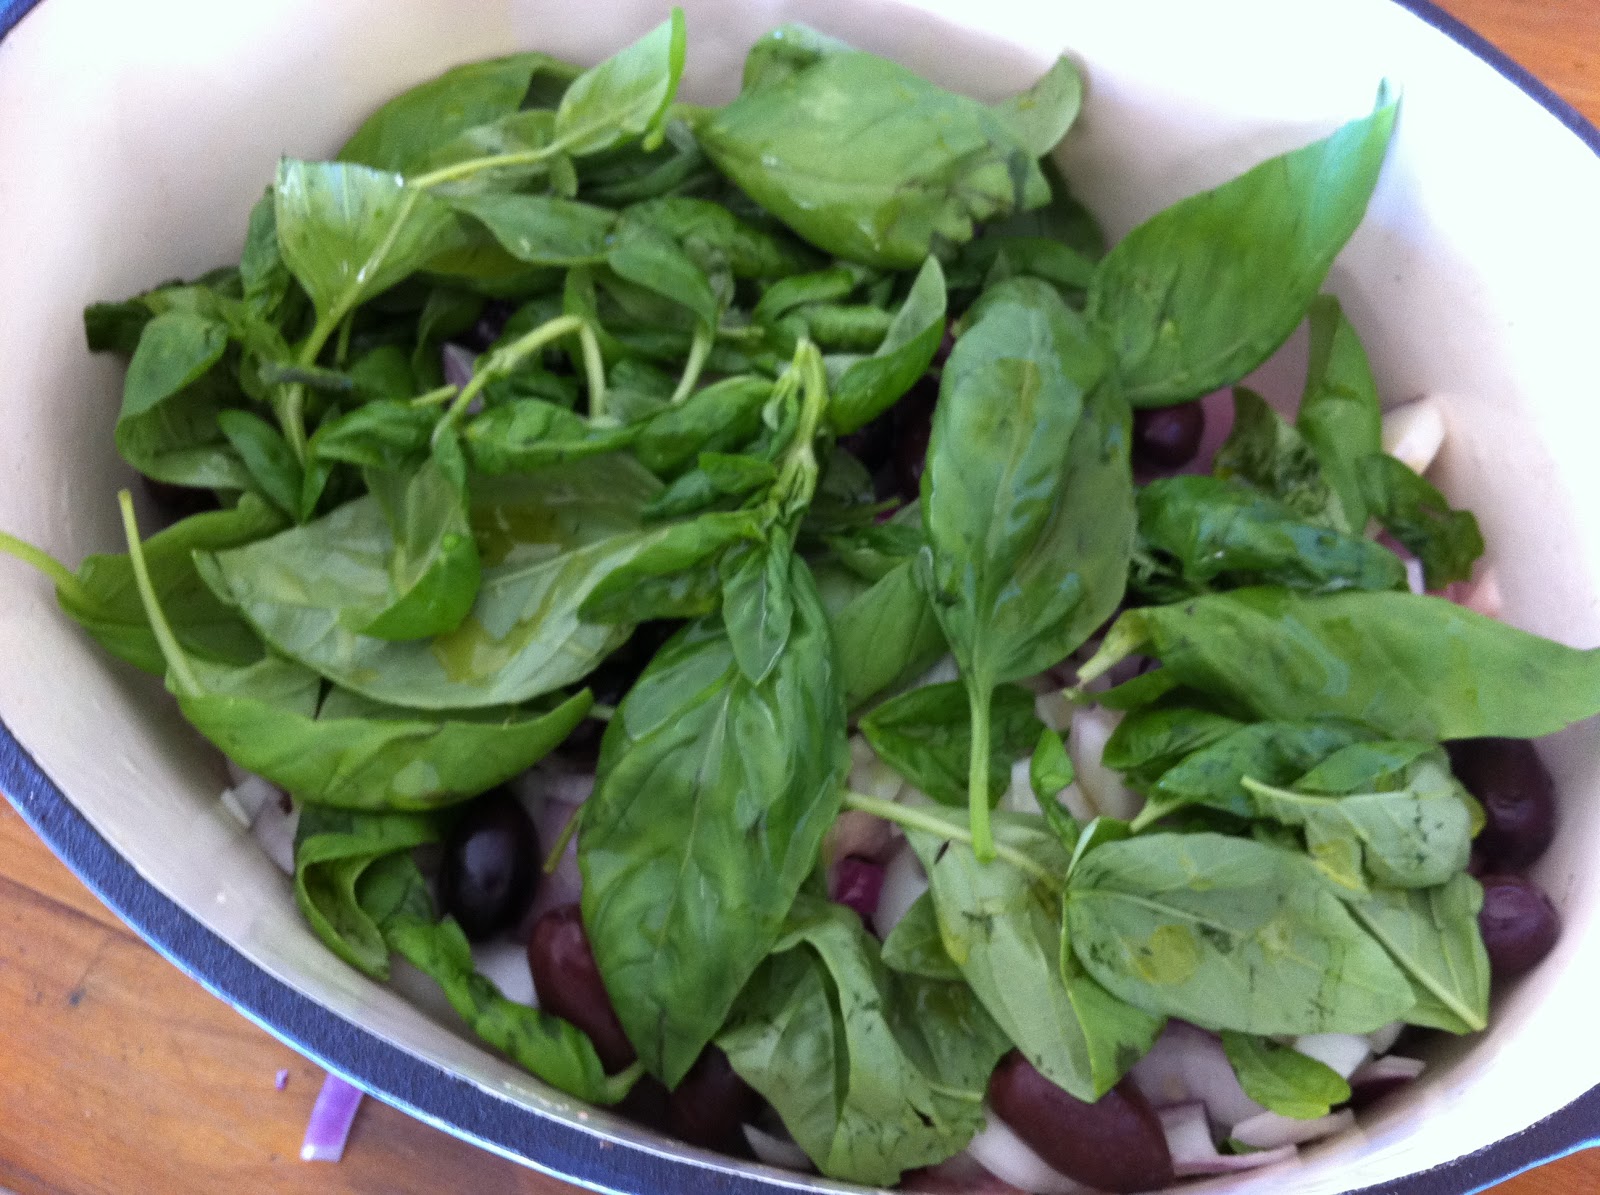
then throw on the rest of the onions, the rest of the basil and sprinkle on the olives...


To finish this dish pour over the passata and add 2 cups of water to the dish... a crack of pepper, sprinkle of salt and another drizzle of oil and then into the oven for 40 minutes with the lid on... then reduce to 180c and take the lid off for a futher 20 - 30 minutes... you'll have chicken that falls apart in your mouth by now....


and will look like this...


Now for the Nokedli...
Nokodli is a Hungarian fresh pasta that you cook by dropping into boiling water...


It will seem and look much harder than it really is... So give it a try... You'll be surprised!


Place flour in a glass or metal bowl... Crack in your eggs and combine...


Add in water and a pinch of salt until you achieve a thick paste like consistency.give it a good mix...it will
go a bit stringy looking this is perfect...


 Get a big saucepan of water rapidly boiling... Pinch of salt in the water... Now the tricky bit..on a wet wooden board place a big spoon full of dough.


Using a wet butter knife cut of a strip of dough and then cut small pieces of dough off into the water...


My daughter filmed me doing this.... which I'll post when I work out how to post videos! It's actually easier than it looks. The Nokodli is cooked when it floats up to top of water. Use a slotted spoon to fish out the Nokodli and place them in a bowl with a little bit a of olive oil and salt....repeat until all the dough is finished...


I think this is a nice way to finish any day!


yours,

Honey Lady


Tuesday, 3 January 2012

Summer Holiday at Second Valley...


This is the view from our family's holiday home in the hills of Second Valley...which are lucky enough to be able to retreat to through out the year. As I type there is the smell of toast in the air, children playing twister in the lounge, my boy eating a punnet of strawberries by my side and when I look up this photo is what I see... I am so blessed....
We have some friends staying with us from the US and last night after staying til dusk on the beach this is what I made for dinner... It had to be quick...as we were ALL beach hungry...you know that feeling after having been by the ocean and you realise that you are so hungry...


Moroccan Vegetable Stew with Cous Cous and Green Greens

For this you will need...

For the stew...

3 baby leeks
5 carrots
6 medium sized potatoes
olive oil
690g jar of Passata
750g tin of mixed beans
ras el hanout
preserved lemon
flat leaf parsley
salt and pepper to taste
200g fetta


For the Green Greens

500g of green beans
500g of broccoli
1 clove of garlic
olive oil
salt & pepper
lemon

For the Cous Cous...

500g Cous Cous
1 massel stock cube
boiling water to cover


I always start holiday cooking with the same thing... a glass of wine...

Now the food

The Stew...

In a heavy based pot pour in enough olive oil to cover the bottom with about 1/2 cm of olive oil... peasant cut up your vegetables and toss them is the pot...add 1 -2 table spoons of ras el hanout and fry off for 5 - 10 minutes on medium to high heat...

A word on Ras el Hanout... which translates to The King's Blend...

This Moroccan spice mix contains pepper, garlic, cummin, paprika, cardamon, mace, ginger, corriander, nutmeg, cinnamon, turmeric, caraway seeds and more...

It is the BEST SPICE MIX EVER!!!!!   It is my firm opinion that it makes everything better...fish, chicken, vegetable, potatoes... I'm even sure that icecream would taste good with it!

I use my friend Anour's blend. I tried to make it once and when I talked to Anour about my efforts he said that I needed to make it 100 times before I'd be any good at it... and quite frankly I don''t have that kind of patience so I buy his!

Ok back to the food...

So your pot should look like this....


And should smell amazing....

Now add in your passata... use a little bit of water to rinse out the jar and add that in also... cover and cook on medium heat until the vegetables are soft... about 15 to 20 minutes...

The Cous Cous...

Is dead easy...put the 500g of cous cous in a ceramic or metal bowl...crumble in the stock cube...pour over boiling water til cous cous is covered then cover your bowl with a saucepan lid or plate so that the steam stays in... leaves it for 5 -10 minutes then take the cover off and fluff up with a fork...this is a gentle scraping that separates the grains... Done!

The Green Greens...

Also crazy easy... take the ends off your beans and trim your broccoli into small green trees...and put them in a large saucepan with about one finger of boiling water on the bottom of the pot...put the pan on high heat for 3 - 5 minutes... watch this pot...the colour of the beans and broc should pop out at you... they go this amazing vibrant green... take them off the heat and place in a ceramic serving dish...get a clove of garlic and with the heel of your hand give the garlic a big bang and crush it a bit...this will allow the flovours to sneak out but not dominate the greens.reens .. take this garlic clove and "tuck"  it into the greens... drizzle with good quality olive oil, crack over some salt and pepper and a squueze of lemon and they are ready to eat....


To assemble...

Place your cous cous in a large serving dish... pour over stew...top with crumbled fetta, preserved lemon and chopped parsley... and enjoy!


Thats about all and now the beach is calling... not before another cup of tea looking at that view....

Yours,

Honey Lady

Why is it a cup of tea always tastes better when on holiday?

Monday, 2 January 2012

Almond & Peach Tart with Honey


We are so fortunate to live on a farm with fruit trees and chooks... I love how the seasons change and the bounty that the trees bring...we have had already a lovely crop of plums...a few amazing apricots and the most divine harvest of white peaches... I eagerly await the next crop of plums, quinces and even our rosehips....
I love that big baskets of fruit land on my kitchen bench... and the cooking that follows...cakes, bakes, sauces and jams...my childhood memories are of this seasonal fruit and vegetable take over that happens.... we get so excited when a new fruit or vegetable is ready...the first tomato...at the moment I'm making daily trips to our fig tree squeezing and searching for that first ripe beauty!!
I'm sure I'll share more of this as the weeks progress...I will definitely have to share my father's Hungarian capsicum recipe with you....
But for now what to do with ALL these peaches...

Almond & Peach Tart

This tart is one that I use as a base for many fruits... apricot, fig, blackberry, raspberry... list is endless and the tart is so easy… I think it really great to have a few rock solid recipes that you can pull out with confidence...

Pastry
2 cups of plain flour
100g unsalted butter
1 egg water
Filling
2 cups almond
100g butter
2 eggs
1/3 cup of honey... bush, cinnamon or vanilla...

So to make...
Heat your oven to 200c
In a bowl place 2 cups of plain flour. Add butter and with the tips of your fingers crumble the flour and butter together. Add the egg and combine. Add a splash of cold water until the dough starts to form. On a floured surface gently knead the dough to fully combine. Then wrap the dough in grease proof paper and place in the fridge.
The trick to really good pastry is the right flour...cool fingers...and minimal working of the dough...
If you don't want to make your own then use Careme Pastry... its a Barrossa product...handmade not bad fats...their sour cream short crust is perfect for this tart...

While your pastry is chilling....
Take almonds and place in food processor and grind until fine. Then add butter, eggs and honey and blend until a smooth paste.
Take your pastry out of the fridge and roll out... grease and flour a 23cm flan tin and then line with pastry... and blind bake
I have a little trick that I like to use when blind baking...I use almonds...one layer is enough and after ten minutes you have lovely roasted almonds that you can eat ~ use in salads or pestos... 


To assemble...
After the pastry is baked fill with almond mix and arrange fruit on top.... just a sprinkle of brown sugar on the top will cause the peaches to caramalise....yum

Bake for about 20 minutes until brown and then reduce heat for another 10 - 20 mins until set and firm.
This gorgeous tart can be had warm or cold... I prefer cold with whipped cream

Enjoy !!!

Yours,
Honey Lady

Picnic at Willunga Courthouse Creek

Willunga Creek Picnic

I don't know if you know this but Willunga has a secret treasure... behind the Old Courthouse there is a babbling, spring fed creek that runs all year round. Around it is lawned and there are picnic tables and a little bridge. Its always cool and comfortable down by the creek under the shade of the willow trees that line it...I grew up with creeks and absolutely love bringing my children here with a picnic...I bring a blanket, pillow, the paper and some foodie magazines and the children play in and around the creek while I rest, read and relax!

Today it was hot and horrible and all my children were off at plays so I went to the creek with my dear friend Anne...and this is what we packed....

Antipasto Loaf with Rocket Salsa Verde and Salad


A word on baking with yeast...

I was fortunate enough to grow up with a mother who baked bread and yeast based sweets regularily... and this is what I know from my mother... about baking with yeast...


 YEAST SMELLS FEAR !

You have to use yeast with confidence and complete faith that it will work...

Yeast is actually a living food in a dormant state when we buy it from supermarkets in sachets.. you can also use fresh yeast but I prefer the sachets.

To make two loaves of bread this is what I do...

First you get the yeast working...it requires sugar and luke warm (not hot ~ this will kill the yeast)water...So I place 2 x 7g sachets of yeast in about 1 cup of warm water and about 1 teaspoon of honey..you can use 1/2 tsp sugar here also...mix the ingredients until its generally combined and looks like this...


After a few minutes in a warm place it starts to froth up and looks like this....this is the little beasties eating up the sugar and producing gas...this always makes me think of year 9 science and wonder who the first person who did this was?!...


Now you can add your flour... to this I add 1kg of strong plain flour...Lauke and Lighthouse do breadmaking flour...the type flour does make a difference to your end result and I highly recomend using the right sort...

At this stage I also add 1 cup of olive oil and 3 cups of water and a sprinkle of salt (1/4 teaspoon)...and mix it with a wooden spoon until it looks like this....


Now its time to get kneeding.... For about 5 minutes or until your tuckshop lady arm bits hurt... kneed... I have a big piece of marble on my kitchen bench that I love to work bread dough and pastry on but any floured surface will do... after place a litttle bit of oil in the bottom of the bowl that you mixed in and return the dough to it... the oil stops the dough sticking as it proves... it should look like this...


Cover this beauty in a damp fresh tea towel and leave in a warm place until doubled in size...its magic! And will look like this...


 Punching down is my favourite bit of bread making... you do just that... PUNCH IT!


This causes the dough to colapse and then its back to Kneeding Town...floured surface and another 5 -10 minutes of kneeding... There are some hard core breadafites that do the rise punch down thing again but I'm too impatient to do this! Own your cooking style I say...

Now...we can make the Antipasto bread.... YAY!!!

To make you will need...

Dough for two loaves as made above
1/2 cup of polenta
1 cup of antipasto vegetables ~ things like pitted olives, roasted capsicum*, semidried tomatoes, marinated artichokes
1/2 cup of chopped herbs ~ basil, thyme, chives... what ever you like really...oregano...
a large baking tray or individual loaf tins...


First...get your oven on...about 220c 

Take your lovely dough and divide it into two... working on one loaf at a time here folks....with your hands on a floured surface flatten out your dough to about a 20cm by 30cm shaped... think rustic here... perfection is not the aim... cut into 3 strips keeping one end joined...Then using things like pittted olives, roasted capsicum, artichokes, semi dried tomatoes and fresh basil dot the dough....the little bit of oil that comes with your antipasto bits is great and makes for a brown and moist loaf...


Then you plat the dough tucking in the bits that try and escape as you go...tuck the ends of the plat under and place in a a baking tray that has had its base covered with a dusting of polenta... this is such a cool way to bake, stops the bread sticking AND also gives the loaf this really yummy crunchy base... I learnt this from an Italian friend! Repeat the dot and plat process with your second piece of dough...


Leave these loavelies in a warm spot to plump up...takes about ten minutes... Yummm...


Now they are ready for baking...I always put a sprinkle of polenta for extra crunch on the top...but is by no means necessary...Place in the oven and bake for about 20 minutes...keep an eye on them dropping the temp to 200c if they start to get too brown...They are done when they are brown and when tapped make a kind of hollow sound...

WARNING: your house is going to smell amazing!!!

While your loaves are baking you can make your Salsa Verde.... this just means green sauce but how much cooler does salsa verde sound than green sauce!

Rocket Salsa Verde

This recipe can be used for any herbs you have about... things like parsley and basil are great

You will need~
The zezt and juice of one lemon
about 500g of rocket leaves
2 cloves of garlic
1/4 teaspoon of rock salt
200ml of good olive oil

In a blender put in the lemon juice and zest. Add the rocket leaves and start to combine... in a mortar and pestle grind the garlic and salt until it goes all fluffy...yes fluffy ...then add to the rocket lemon mix...now add the olive oil and fully combine... taste and adjust seasoning with either more lemon juice or more salt... place into clean jars and cover with a thin layer of olive oil...this stops the salsa verde browning and preserves it... place in the fridge and it will keep for about a week...

Anne and I had this with our Antipasto Loaf....


And here are a few snaps of the Willunga Courthouse Creek...


*Every year about this time when the capsicums are in season and plentiful I roast up and preserve a big batch...olive oil, garlic and thyme... and then we eat them in everything...salads, dips, sandwiches, pasta, tarts...